Sunday, 15 February 2015

Painted blooms notecards

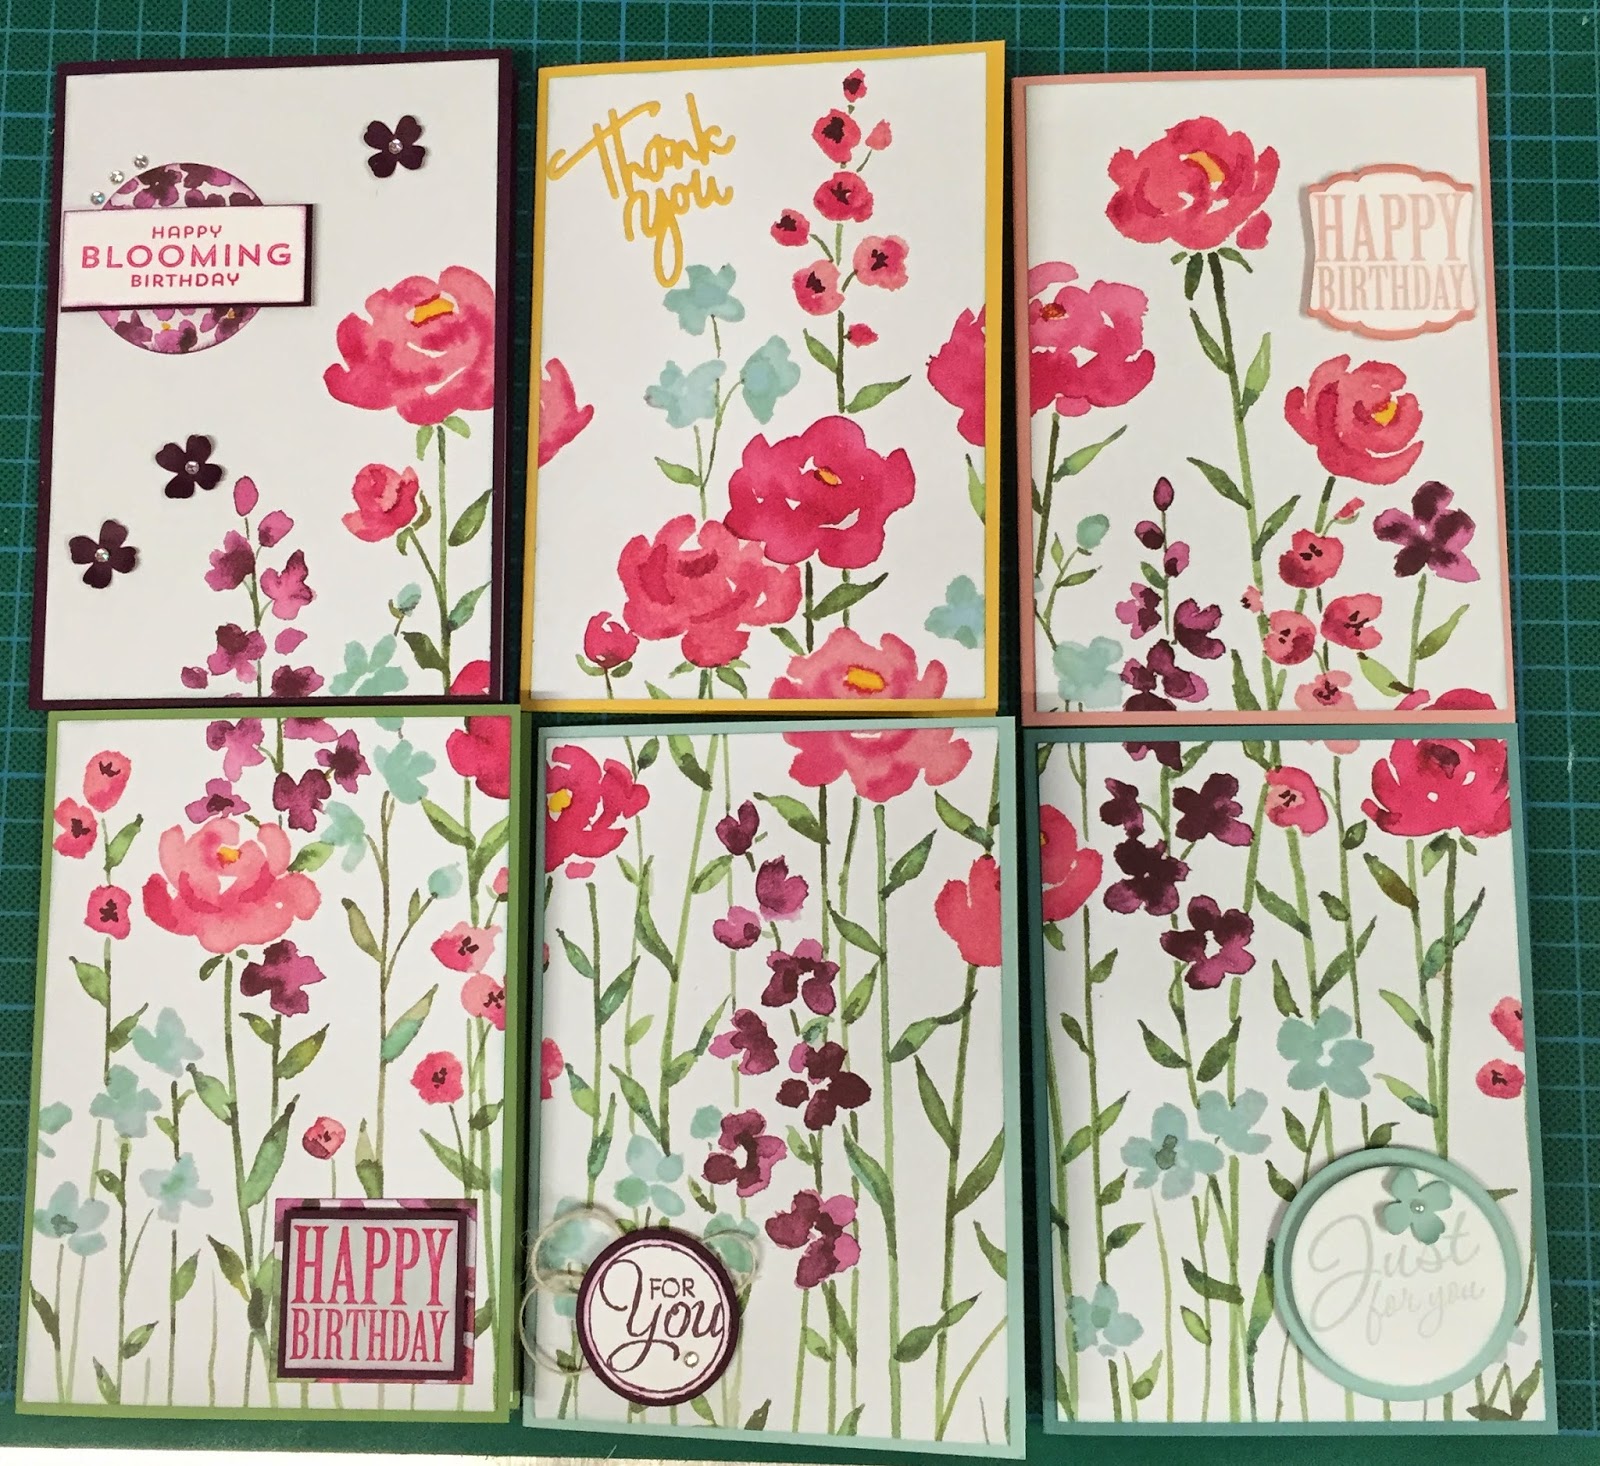
I've seen several pins where the lovely Painted Blooms designer paper was chopped into 6 and cards made from it.  To me this seems like a cheats way of making cards but they all looked so lovely I had to have a go!

When I'd finished I made a box to hold them and will give them to my sister in law for her birthday.

This is the original sheet of paper


and these are the finished cards


with one of the finished envelopes, stamped with the matching stamp set


and finally a box for them all to go in.


Monday, 9 February 2015

Bow builder punch

I'm loving this new punch from SU - I can use up my scraps of paper to make quick and easy cards.


I had quite a few scraps left of DSP and it was easy to punch out several bows and this is what I made them in to.


While I was at my craft desk I thought I'd better make a couple of cards for birthdays I having coming up this week!

Love this stamps set too!


Thanks for looking and I'll be back soon :)


Tuesday, 20 January 2015

Birthday card

A birthday card for my daughter Holly, hence the holly leaves Lol!


I'm loving the new Stampin Up stamps - the amazingly amazing  stamp is from Painted Petals and the insert uses Balloon Bash.  


Wednesday, 14 January 2015

Painted petal thank you cards

I have lots of new goodies waiting to be played with but just haven't had the time recently.  My husband is on a mission - to clear our lofts and so every bit of spare time has been taken in sorting out the enormous amount of "stuff" we have accumulated over the last 30 years.  We are hoarders so there is a serious amount of stuff, I can tell you!

Anyway, I took some time out yesterday to finish off some thank you cards I started just after Christmas and here they are.

I've used some of the new painted petal stamps which I can see are going to be so versatile.


The insert has been stamped to match.


A different colourway

and the inside.


Tuesday, 30 December 2014

Playing catch up

Oh good heavens, where has the time gone?  I can't believe it's over a month since I posted on here  Of course Christmas is a very busy time for most of us so I have no excuses really except that we did organise a Christmas event on our drive at home to raise money for a local charity and we only had two weeks to sort it all out!

Anyway here are a few things I made before Christmas.

A birthday card for my friend Sue,


some crackers for my daughter - one of her presents was gel nail polish and I made a box of crackers to put the bottles in to make it look a bit more exciting!


A simple Christmas card


or two ...


A here are a few pictures of our Christmas fund raiser.


and our very own Miss Christmas :D


Tuesday, 25 November 2014

Penguin gift box

How cute is this little fellow?


My curvy keepsake die came this morning and I was dying to try it out and this is my first attempt.  He needs a bit of tweaking - his feet aren't right, neither are his wings (or are they flippers?) but I'm happy with the effect.  I've seen lots of different ideas on the internet and so my penguin is a combination of various ones I have seen so I can't credit one person for the idea.

Next I want to do Father Christmas and a snowman :)

Sunday, 23 November 2014

Card in a box

It's my daughter in law's birthday on Thursday and as I haven't made a card in a box for a while, I thought I'd make one but a long one rather than a square one.


I made an envelope using the envelope punch board as my card ended up 6" x 6.5" so a bit of an odd size.  I didn't have a big enough piece of paper in the right colour but I thought this was a pretty good match.


I hope she likes it:)


The only thing that aren't SU are the balloon stamp and die.


Tuesday, 28 October 2014

Choose Happiness

Love this stamp set and enjoyed playing with it today and this is the result - 5 cards all the same but all slightly different.

On this first one you can see that I have stamped the inserts to match.


This is the full frontal so to speak!


I didn't plan on making them A5 size - in fact I cut out the blanks and scored and folded them then cut out the tops thinking I'd trim them to size once I'd stamped them.  I forgot and put ribbon etc on and it was too late to start trimming so they ended up bigger than planned but at the end of the day, it doesn't really matter does it?

Sunday, 26 October 2014

Beat the Christmas Rush Christmas cards

This month I have only managed 4 cards rather than 5 as I am busy making things for my charity craft fair in November.  I probably will get around to making another but I thought it was best that I upload now rather than wait and forget or have a last minute panic about my stall and forget Lol!

I have used the same set of stamps as last month - they are so versatile and I love them.  The papers I have used are unfortunately retired from SU but I still like them.


The idea came from Pinterest and as usual I didn't actually pin the card so I'm not sure who made the cards and whether they used acetate in the gap to give the card more strength but I didn't and they hold up okay.

If you want to join in with BtCR (perhaps you've left it a tad late this year but if you got 10 cards made before December that would be a start) pop over to Sue's blog for all the details.


Friday, 17 October 2014

Notebook holder tutorial

I've been making some notebook holders for Christmas gifts and also to sell at a charity Christmas Fair I will be attending next month.  They are so easy to make and I think they look good so I thought I'd share a tutorial with you.

Here are a couple I've already made - one I think I've shown before.


These are the note books I used - they come from Paperchase and cost £2 each but you can buy them in any stationery shop.  They measure 5 7/8" x 4 1/8".  (If anyone can tell me how to write fractions on a blog post I would be very grateful!)


And here is the book I will show you how to make today.


Okay, so I'll start but I will warn you it is a long post but it's nearly all photos which should make it easier to follow.

You will need

2 sheets of A4 card stock or one sheet of 12" x 12" card stock to make your folder.
A selection of patterned papers - I used Stampin Up paper stack because the size was perfect.
Adhesive of choice
Corner rounder
Ink pad and sponge dauber
Paper trimmer with scoring attachment or a scoring board
Note book
2 craft magnets
Glossy accents or similar strong adhesive

My measurements are based on using A4 cardstock - if you use 12" x 12" you will need to adjust the size of your patterned paper for the flaps.


Trim a 1 1/2" strip off length of card so it now measures 6 1/4" x A4 length


Sorry, this should read "stick your magnet down where I have marked an X".  That will teach me to make things when it's gone midnight!


I went wrong here and rounded both bottom corners as you will see on the following pictures!


I made a couple of tags to pop in the pocket.


Well that's it - I hope you enjoyed my little (!) tutorial and if you make a book, I'd love to see it:)