Monday 30 June 2014

A new look ...

Welcome to my new look blog, designed for me by Catherine Carroll  www.ideasinkorporated.com. I know my blog has been sadly neglected of late but now I hope to rectify that and post on a regular basis.

You might notice that I am now a Stampin’ Up demonstrator – a hobby one really, I don’t intend to make it my life’s work but I so love the products I thought I might as well join up.  There’ll be no hard sell from me but if you see anything I’ve made using SU items and you would like to buy the stash, then email me/phone/text, my address and phone number are at the top of my blog.  There is also a button on the side bar where you can have a browse through a catalogue where there are lots of ideas (as well as lovely stamps and papers) which even if you don’t want to buy, you can work out how to use your own stash to get similar results.

To kick things off I thought it might be nice if I offered my  lovely readers some blog candy – some of the new Stampin’ Up clear stamps.  To be in with a chance of winning these stamps, please leave a comment below and if you don’t already, please follow me.  You have until the end of June to enter.  Good luck J 

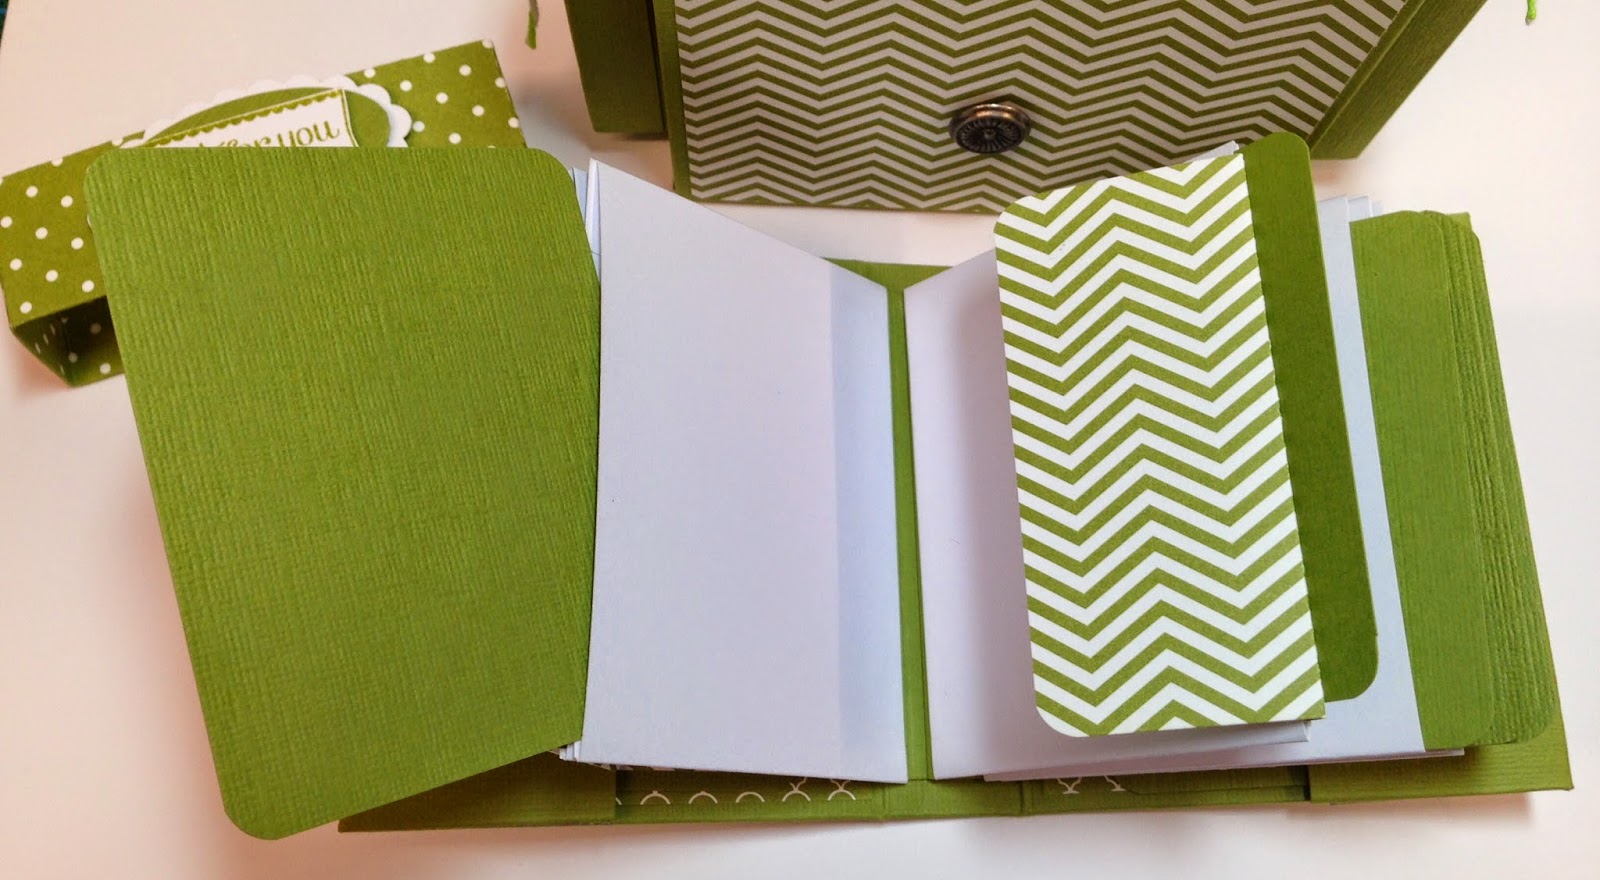
Here is a page made with mostly SU products.  It's for the monthly challenge over on UKs where we had to use a quote from Winnie the Pooh and friends so I thought this one was apt.


This is our new camper van called Hattie.  Polly was our previous one but she was getting on so we thought it would be nice to get a new one.  I'm sure Hattie will appear in many layouts to come :)


Supplies:
Cardstock - cherry cobbler
Papers - I am me designer series papers
stamps - starburst sayings, show and tell 2
Ink pads - summer starfruit, coastal cabana, read red
Framelit dies - starburst
Punch - chevron

Don't forget, leave a comment below and follow me and you will be in with the chance of winning some lovely stamps.


Tuesday 24 June 2014

Beat the Christmas Rush

I haven't been able to get in the Christmas spirit this month so I've only made two cards - one of which I don't like - it's just not me but.  All the elements are there, it just needs zhuzzing (how on earth do you spell that word?) up  Lol!


Here's the one I like, some of the snowmen have been fussy cut and popped on to foam pads to give them a bit of dimension and the one I'm not so keen on is the one below.


The penguin have been made from the Stampin' Up owl punch and I can see endless possibilities with the punch when I am in the right frame of mind.

Anyway, two more cards have been made so I'm happy.  There's still time to join in, pop over to Sue's blog for all the details.  Come December, you'll be glad you did :)

Thursday 19 June 2014

A little bit of caseing going on...


I was lucky enough to receive a card similar to these last week from Michelle Last and as soon as I saw it I knew I wanted to CASE it (copy and share everything), it was so gorgeous.  Anyway, it turns out that she'd already cased it from Tracy May!


I didn't have the same background stamps as Tracy or Michelle so I used some of the SU Gorgeous Grunge stamps and Lost Lagoon ink and the sentiment is from the Polka Dot pieces stamp set.  On the next two


I used Hello Honey and Blackberry Bliss inks.


The final one is similar to the first.


Here they are all together.


Supplies:  All Stampin' Up unless specified.

Inks - Blackberry Bliss, Lost Lagoon, Hello Honey,
Cardstock, Blackberry Bliss, Lost Lagoon, Hello Honey and Whisper White
Stamps - Polka Dot Pieces and Gorgeous Grunge
Large Butterfly punch


Kraft cardstock, crystals, twine and small butterfly punch I've had a while and not sure of the manufacturers.

Wednesday 18 June 2014

Scavenger Hunt

My third photo is now ticked off the list, number 8 on the list :)  My daughter has a tattoo on her foot and she was curled up on the settee earlier with her foot poking out - so I snapped!

Only 18 more to go!  Have you joined in yet?  Check out the details here.

Tuesday 17 June 2014

Birthday card

My very dear friend Maria celebrated a big birthday over the weekend and this is the card I made for her.


the insert


and the envelope


Looking back at it now I think I probably went a bit overboard on the flowers LoL!


I made her a mini notebook/photo album too 


with a box to match.

Happy Birthday Maria, I know you had a fabulous weekend and I wish I had been there to share it:)


Monday 16 June 2014

Rinda's Summertime Scavenger Hunt

I saw a post about the Rinda's scavenger hunt on UKs and just had to follow the link to see what it was all about.  The idea is that Rinda posts a list of 21 items for us to find and photograph before the autumn equinox on 23 September 2014 then post our photographs on our blogs or however else we share things these days.

This is the list:-

1. A sign welcoming people to your home town (or a nearby town)
2. A garden gnome
3. Birds on a wire
4. A group of tourists
5. A rack of post cards
6. An urban street scene
7. A rural landscape
8. A tattoo on a person
9. A bakery
10. A photo bomb (someone found lurking in the background of photo; the lurker may have intended to disrupt the picture or may be doing it unintentionally, but the background lurker is a surprise to the photographer)
11. A horn
12. A mascot
13. A sunrise
14. A parade
15. A juggler
16. A sign in a language other than English
17. A lamp post
18. A water fall
19. A public garden
20. A bus (not a car, truck, lorry, camper or RV) with a picture painted on its sides.
21. A photograph of you with something representing the season (recognizing that the season will be Winter for our friends in the southern hemisphere). Note: you may not use a substitute for this item.
If you find something on the list too difficult, you may substitute one of the following items for anything on the list, except for Item #21:
Alternative A: A kite, hot air balloon or blimp
Alternative B: A bird house

Yesterday we went out in Hattie (our camper van in case anyone is wondering) to a place near Stoke Bruerne on the canal.  It's a nice place to walk the dogs and sit and have a cup of tea or in our case, soupl and crusty rolls LOL!  I'd printed off the list so I was mindful of my surroundings when we took the dogs out for a stroll.

I was looking for a nice rural landscape (no. 7 on the list) and I took my first photos of the canal  


but decided that this next picture summed up rural more.


I also managed no. 3 on the list - birds (okay bird) on a wire!


Why don't you pop over to Rinda's blog and join in?


Wednesday 11 June 2014

Triple stamping quick tutorial

I was asked by one or two people if I would share the instructions for my triple stamped card I showed on here the other day - this is the one.


Below is the card I have just made


and here are the instructions:-

I started with an A4 piece of card in the colour I wanted for my layers and the base card.  I cut this card in half (I did mine so I had two long bits but it doesn't matter which way you cut it.  Fold one piece in half to be the basis of your card and cut a piece 10.5 cm x 6.5 sm and another piece 7.5 cm x 4 cm for your layers.

Next take some white card and cut one piece at 14.2 cm x 9.9 cm, a second at 10 cm x 6 cm and the third piece at 7 cm x 3.5 cm.


Using some repositionable adhesive, put a small amount on the back of the smaller pieces of card and layer them on the the biggest piece of card.  This is to hold it in position while you stamp over the three layers.


Then ink up your stamp and start stamping making sure some of your impressions go across the three pieces of card.  It doesn't matter about the bit of white left where the two pieces of card meet as they will be covered by your coloured mats.


Carry on stamping until you have done enough - I decided to change colour with mine.


Then, carefully take the top two layers off and mat them on to the coloured card


then stick these to the last white layer.


Make sure your layers match up properly and then finish off with a sentiment.


If you don't understand anything please feel free to email me - I'm not used to doing tutorials so I might have written complete gobbledegook LOL!

If you make a card, leave me a link so I can have a look:)  Thank you.


Supplies: All Stampin' Up unless otherwise stated
Cardstock - summer starfruit, whisper white
Inks - summer starfruit, coastal cabana
stamps - flower shop, petite petals, label love
punches - petite petals, label love
crystals from Hobbycraft


Tuesday 10 June 2014

Project Life and a couple of birthday cards

Most of you will know that Stampin' Up are now partnered with Becky Higgins - all the products are in SU colours and as from today, a small selection of Project Life is now available to order - the rest will be out with the new catalogue in July.


If you'd like to order anything from the above, just let me know:)

Now, changing the subject slightly, June is quite a heavy month for me in the card department and here are a couple I have made for my niece and nephew.


I wasn't sure if the colour scheme for the one above was girly enough for my niece so I added a few flowers to help it along!  I'm still not convinced but her birthday is over a week away so I have time to make another if I decide the colours aren't right.  What I really need are some pastel coloured ink pads and perhaps a pink one too!


I'm much happier with this one.

All supplies are Stampin' Up except for the white cardstock

Stamps - gorgeous grunge, starburst sayings, petite petals, banner blast
Cardstock - mossy meadow, tangelo twist, blackberry bliss, hello honey, coastal cabana
Ink pads - baked brown sugar, tangelow twist, pistachio pudding, mossy meadow, blackberry bliss, hello honey, coastal cabana
Papers - brights DSP
Punches - petite petals, chevron, itty bitty punches, banner blast.
candy dots and framelits starburst dies

Monday 9 June 2014

Double and triple layer stamping


I've been having a play today - using a technique I haven't done for years, triple layer stamping.


You stamp three layers or card at the same time, one on top of the other in decreasing sizes and then layer these stamped images on to contrasting card and it looks very effective.

To finish this card off, I stamped the insert to match but left out a greeting as I haven't decided who I am sending this to yet.


Here is another card but this time I only stamped two layers rather than three.


Supplies:- All Stampin' Up except where stated.

Stamps - stippled blossoms, so very grateful, chalk talk, label love
Inks - midnight muse, coastal cabana, crisp cantaloupe
cardstock, basic black, whisper white, midnight muse.

The images on the second card were stamped with Memento ink and coloured in with Promarkers.

If you'd like to buy an Stampin' Up supplies, email or text me and I'll be happy to take your order.  Thank you :)


Saturday 7 June 2014

Mini rucksack

Elaine from Papercraft Button inspired me yet again today with her fab mini rucksack box.  You'll find full instructions on how to make it over on her blog.

This is my version:-


However, I went a step further and made a mini album to go inside it.


There are pull out cards within each page to add more photos or journalling, you might see it better on the pictures below.


I am sure I will be making this several times over in lots of different colour ways.  Thanks Elaine for the inspiration.